Posted on Leave a comment

DIY Greasing HMMWV Pulley

Are your HMMWV® HUMVEE® pulleys making an annoying sound? Well, more than likely you just need to grease them up.

Here is a quick DIY way of greasing your HMMWV® pulley just using tools from your home garage. Yes, the proper way would be to press out the bearing and break it apart but this is a quick DIY. If you have inputs on how to do it better while just using home tools, then please share so we can help the group.

Step #1: As you may have guessed it, it’s to remove the pulley. Wait, no it’s not. Step number one is to remove your belt :).

Step #2: You can rebuild all of them or just turn each pulley by hand and see which one is making the noise. If you can isolate it, then take off that pulley. If you can’t isolate it, then do them all 🙂 it’s not like you have anything better to do with all of this quarantine.

Step #3: This is where you would use a press to remove the bearing but if you don’t have one then you can do the next best thing. Using the tip of something sharp remove the black caps on both sides. Be careful here, you want to go from the edges and not cut into the caps. This will expose the internals which will likely be dry and fully of dust/dirt.

Step #4: Using your compressor blow out all of the dirt from the inside. Start slow and do it on both sides. Spin the bearing a few times and then repeat.

Step #5: Now, add some grease. There are lots of options out there and people can make arguments for which is better. I elect to go with Spartan grease because I know the people behind the company and I would rather give my money to them vs a company thousands of miles away. If you would like to buy their product, then check them out here: https://www.modernspartansystems.com/ . When greasing, use a thin brush and try to get the grease in all sides. Then spin the bearing forward and backward. Then grease again. You can use your blower at low pressure and try to push it in that way as well but the brush is your better option.

Step 6: Now replace the caps from step 3, and clean off any extra grease.

Step 7: Install it back

Step 8: Do whatever I forgot to mention

———————————

Click here to check out trucks that Damage Control Customs has to offer.

Click here for parts offered by Damage Control Customs.

Click here for a consolidated HMMWV how to articles and videos.


HMMWV® M923 M998 M1045A2 M1123A2 M1097A2 HUMVEE®

Posted on Leave a comment

How To DIY Install HMMWV © HMUVEE © Backup Camera

Have you ever wanted to do a DIY Install HMMWV © HMUVEE © Backup Camera? 

If you’re interested in installing a rear-view camera for you HMMWV © then this article may be for you.  My goal with this article will to be share how I did it and what my first impressions are.  My intentions aren’t to promote one brand over another or make any recommendations, simply share my experience.


So, it looks like back in 2017 I purchased a 12V / 24V wireless backup camera on Amazon. The product purchased was “Camecho RC 12V 24V Car Backup Camera Rear View Wireless IR Night Vision Backup Camera Waterproof Kit”.  I would share a direct link, but my intentions aren’t to promote any brand.


So, let’s talk about the how, how did we write up the camera and display.

In this case we’re installing it on a M1045A2 truck.  The 1045s have the slant backs and the right sponson already has a designated spot for an antenna, typically a AS-3900 military antenna is mounted there.  The very front bolt whole was an ideal spot to mount the camera.  I was originally going to purchase one of those clear glass overhead camera dome covers and just mount it in the middle of the antenna base but mounting it like this was super convenient and no custom fab was necessary.

IMG_8874-(W)

Once the camera was mounted, we simply drilled a whole in the antenna plug plate and fished the wires down.  In the future we’ll run some NP1 around the wires to make it watertight.  Since just about nothing is watertight on a HMMWV © we’ll get to this step at a later time.

IMG_8875-1

Then we fished the camera wire down through the grommet above the right rear tire.

IMG_8878-(W)

Then, we simply tapped into the ground and positive from the right rear market lights.  This way the camera will work anytime the marker lights are on.  We could have ran power directly and installed a sperate switch but we felt that we would not have a need for the camera unless the truck was running and the lights were on.  That means it can’t be used in blackout mode but that didn’t matter for us.

IMG_8877-(W)

Then, we took a separate battery and hooked up the display to make sure the camera and display were talking to each other before spending the time to wire up and mount the display.  And they were.


Let’s move to the inside of the cab.  So, we took the display mount that was provided and drilled new wholes to match the mounting wings on the HMMWV radio tray and simply mounted it right onto the radio tray.  If you look at the top wings of your radio tray you’ll see two mounting spots.  We just drilled onto the display mounting bracket to match the radio tray.

How did we run power to the display?  We fished the wires behind the instrument cluster and took negative from the main ground coming in.  When you open up your instrument cluster, on the top right, behind your heat controllers, you’ll see the main ground coming into the truck.  It should have a double nut behind it.  The best way to access it is to open up your cluster, then take out your doghouse.  That way you’ll have access to the front and rear of the bolt.  If I remember correctly it’s a 7/16.  Then we took the positive from the right cluster light.

Sorry, didn’t take pictures of this process.

As a result, once the marker lights are turned on the camera is on.  Once the dash / cluster lights are turned on the display is on.  This way, it’s automatically turned on and always stays on.  We could have run a switch to the reverse or added a manual switch, but we actually wanted the camera always on for as long as we’ve turned on the lights to the truck.

IMG_8882-(W)


Ease of install: Easy

Effort of install: Medium, it took some trial and error before we finalized on where we wanted to draw power and how we wanted the display to operate.   All in all, it took a few hours but mostly due to planning.

The good:

  • It actually comes with built in functionality to support two cameras, the kit came with one
  • I haven’t tested it at night but it says it has night vision mode
  • Price point, super cheap. I think I paid like $60
  • For the price the video quality is good.  Could be better but for the price paid it’s GREAT.

The bad:

  • The display mount is SUPER thin.
  • The wires are way too thin for something that is intended to go into a car.  I would expect thicker wires and way more insulation over the wires.

Conclusion: 

In all honesty, next time around I will likely pay more money and buy a system with better hardware and will likely go with all wired vs the wireless.  I would also pay more attention to screen capture with of the camera.

Thank you for reading this article.  If you enjoyed it, then please comment and share.

Check out trucks that Damage Control Customs has to offer here.

Click here for parts offered by Damage Control Customs here.

Click here for a consolidated HMMWV how to articles and videos.

If you have any questions please feel free to reach out directly or fill out the form below and you will be contacted.

Posted on Leave a comment

HMMWV© Gift Ideas

Hello,

as we approach the Christmas 🎄. I wanted to take a moment and list out some Christmas gift ideas for HMMWV© / HUMVEE© owners.   

So, if you’re looking for a gift idea for your husband / boyfriend, or super cool wife / girlfriend, then you’re at the right place. 

I’ll strive to give 3-5 options in the <$50, <$100 and >=$100 price ranges.  I will include mostly HMMWV gifts and a few other relatable items as well.

If you have any recommendations, then please feel free to comment or email me directly at damagecontrolcustoms.gmail.com


Gift ideas <$50

 
  • If the person you’re shopping for has the HMMWV ® X-doors and all of the bolts are rusted, then consider buying them a door bolt kit for only $25.90door Bolts
  • If you’re okay with an item that wasn’t made for the military, then these are a good choice.  CIPA 11050 Suction Cup Marine Mirror on Amazon 41uIKdwCbbL._AC_.jpg
  • Here is a re-purposed surplus items that can be used as a cellphone holder and mounted in different locations within the HMMWV©.   You can also use promo code “Win10” to get an extra 10% off until Dec 31 2020.Who doesn't need a cellphone holder? $34.99
  • We all know the OEM cluster lights just don’t cut it.  So, what options do we have?  Just go LED.  Joey has used these and loves them.  For $10 it’s an easy decision vs the others offered.51rW5QGdhoL._AC_SL1000_
  • Need to upgrade you rear bumper?  How about some tear drop shackles? You can also use promo code “Win10” to get an extra 10% off until Dec 31 2020.IMG_7501

Gift ideas <$100

  • Are you reconditioning your HMMWV ® X-Doors?  You should consider replacing the seals.  door seal
  • Want him to man up?  Then, get the MAN CAN.  They have $30, $60 and $100 options available.  Additionally, to the best of my understanding, during the month of November they list all their overstock items from past man can items and usually run a 10% off code.IV8888_ManCan_Regular_6ba7e21b-eea0-48eb-87fa-eee2f4034b13_2880x
  • Having grounding issues, then you may wish to beef up your grounding.  You can also use promo code “Win10” to get an extra 10% off until Dec 31 2020.GroundHarness1
 

Gift ideas >=$100

  • Need some extra protection 🙂 ? Who doesn’t!  Check out these guys for some armor.  You can also get get 10% off by using promo code “Rub10“.  Here is a link for a full review.B584A9D4-BA13-426D-8ABE-C6B6BEDDA660
 
  • What about your seats?  What your seat colors don’t match?  Here is a cheap was to solve that problem, MOLLE Seat Cover.  Don’t know who this seller is but a HMMWV© owner recommended them and they are just under $50.
  • s-l500.jpg
  • In need of new shocks?  Ya, we know, the ride is rough but that’s mostly due to your tires.  With that said, if it’s time for new shocks, then these are available for a cheap price.  You can also use promo code “Win10” to get an extra 10% off until Dec 31 2020.HMMWV Shocks
  • Interested in doing some upgrades, what about locking spindle nuts?  You’ll need 4 if you’re doing them all. SpindleNut3
  • Do you really want to impress someone?  Consider getting them a VIC-1 or VIC-3 Intercom systems.   You can also use promo code “Win10” to get an extra 10% off until Dec 31 2020.
  • VIC-1
  • VIC-1/VRC Intercome
    VIC-1/VRC Intercome
  • VIC-3
  • VIC-3 set
    VIC-3 set
  • What about some Vision X 7″ Vortex LED Headlight XIL-7RDBKIT?  The OEM lights aren’t any good and even if you don’t go with these lights, consider upgrading to something that LED. 
  • MODheadLihgts
Please note the featured image comes from: https://www.defense.gov/observe/photo-gallery/igphoto/2001083620/

Posted on Leave a comment

DIY: How I Assemble A HMMWV / HUMVEE Door / X-Door

Thank you for reading this article.  If you enjoy it, then please comment and share.

This is simply me putting together an X-Door which was recently painted. The goal of this article to simply share what I do.  Said in another way, this isn’t a detailed instructional article which necessarily follows the military process or any other professional process.  Just what I do.

All content here are for reference purposes only: Always consult with an expert if you are not one.

For a detailed list of bolts I used please see here.

With all that said, here we go!

Step 1:  You’ll need bolts, lots of them.

Make life simple for yourself.  What do I mean, when you start to disassemble your first door what you should do is grab a small empty box and gather all of your bolts off of that door.  I don’t try to save all of the washers and nuts.  I try to have one complete bolt, nut, and washer(s) per given set.  Where to me, a set is the number of bolts, nuts and washers you would need to reassemble a given part, or example the the armrest / latch, the hinges, latches …  For example, the latch has 4 bolts, 8 washers, and 4 nuts.  In this case, I would retain 4 of the bolts, two washers, and one nut.  When done you should have all of the bolts, and a single set of nuts and washers per set.  Then, I take this box to my local Fastenal and ask them to gather everything X 4.

Note: I stick to stainless

Note: More than likely Fastenal will not have the exact length for every single bolt.  Whatever you do, don’t get anything shorter, a tad bit longer will be fine.

Note: Consider getting extras of everything.  You will likely lose a few washers and a few nuts.

Step 2: Installing the window.

I like to start off with the door upside-down.  That allows me to slide the window into place by myself.

Note: Don’t forget to install the window rollers.  Otherwise, your window will have too much play within the frame.

roller.PNG

When installing the window I like to put the top window rollers in first, then slide in the window frame just passed the halfway point.

Then, I install the bottom window rollers and finally slide the window all the way up and lock it in place.

Step 3:  Installing the window stop assembly

My next step is to install the window stop assembly.  I do this next because I want to make sure the window doesn’t slide off and brake if I accidentally slip the door to the right side up position.

Step 4:  Installing the arm rest / latch assembly

It could be argued if this should be the next step or if should come only once your lock / latch has been installed.  I personally do it next.

armrest.PNG

Step 5: Installing your Lock

This is very straight forward and not much to be said here.  The only thing to note is that you should make sure not to forget the door spacer that goes between the door and the latch from the inside.

latch.PNG

Step 6: Installing the door handle

Next you want to install your handle from the outside.  Not matter if you purchase the locking handles or the standard ones the process should be identical.

Once you have your handle bolted up, not tightened down just bolts, washers, and nuts in place, then you want to connect the door latch road from the actual latch to the actual latch.

latchroad

Once you have the latch road in place, then you want to make sure your spring is attached and under tension.

spring.PNG

Then you want to confirm that your latch will lock in place and released when you unlatch it from the inside or outside.  Test this out a few times.

Step 7:  Hinges

Finally, you want to install your hinges.  You don’t want to tighten down the bolts.  Just get the nuts on and tighten it just so it’s not wobbling.   Once you hang the door and line up the door latch with the striker and only then you want to tighten down the hinges.

Note: don’t forget the spacers behind the hinges

Note: don’t forget to install your limiting strap retaining.  Otherwise, you wont be able to connect the limiting strap from the body to the door and your door will swing open all the way and potentially scratch by rubbing on the mirrors or other doors.

Note: You want to pay attention to the hinges for you do have a right and left.

Here is a time-laps video of everything explained above.

Thank you for reading this article.  If you enjoyed it, then please comment and share.

Check out trucks that Damage Control Customs has to offer here.

Click here for parts offered by Damage Control Customs here.

Click here for a consolidated HMMWV how to articles and videos.

If you have any questions please feel free to reach out directly or fill out the form below and you will be contacted.

Note: Several of the pictures posted on this blog are been pulled directly out of a google search and don’t belong to me.

Posted on Leave a comment

New order for HMMWV

The National Guard has put in an order for 739 M1152 HMMWV’s

The dollars keep on flowing,  therefore HMMWV production continues.

Thanks to an article published by shephardmedia I’m happy to announce that we should have just shy of 750 new HMMWV.  The National Guard has put in an order for 739 M1152 HMMWV’s.  This new order is valued at $89 million. This order is in addition to order placed back in Oct 2018.  Delivery of the new order is expected to start Q3 2019. In conclusion,  the HMMWV life line continues.  However, as civilian’s we will likely not see the impact of this for years to come.

What is a M1152 details:

According to AM General, “The M1152 is an Expanded Capacity HMMWV enhanced with Integrated Armor Protection as a Cargo or Troop Carrier. It is a two-man vehicle used primarily to transport personnel, but can also be used as a shelter carrier. The M1152 provides superior troop protection and is capable of carrying up to eight passengers under the Armor Troop Carrier or Troop Seat options.”

If you appreciate the article, then please follow us on facebook, Instagram and YouTube:

If you have questions for the Damage Control Custom’s team, please click here.

To view current HMMWV’s for sale, please click here.

How to download the full spec sheet for the M1152 please click here.

Finally, the full article from shephardmedia please click here.


Have any questions or suggestions?  Submit below.

Posted on 2 Comments

HMMWV Cartoon

Check out some of these cool pictures.  I’m having fun turning my HMMWV pictures into cartoon pictures.

I’ve had the pleasure of working on all of these HMMWVs. Turned them from a tough machine to a work of art!


Posted on Leave a comment

OctaneMarch2019

How do you not return when everyone there loves you.


I have been been at the Caffeine and Octane show several times and I must say it’s one of my favorite events.  They always treat me nice.  Everyone there loves my trucks. And best of all lots and lots of people visiting.


I got to see everything from cute Jeeps, to muscle cars, to fast cars, even cars from Russia.


As you you can imagine I took MasterCraft to the show.


Below you you can check out some of the pictures I took.


Posted on Leave a comment

Custom Hood Grills

Special announcement


As promised, this week we would like to disclose our reveal of a special hood grill for the HMMWV.   

But before we do, a quick reminder. By now everyone knows that DamageControlCustoms.com was the first to introduce special HMMWV hood grills.  I’m sure everyone also knows that we make similar items for 5 ton and can make custom grills with your desired logo.   So, if you would like any of our standard designs for your 5 Ton, or if you would like a custom one made just for you, then please feel free to reach out to us directly. 

With all that said, here is our official reveal of our new custom grill.  We have pre-made only 4 of these for sale but based on demand we will produce more.  You can be one of the very first ones to own it by order here.

ABD9302B-EEE1-47A7-865F-DE00BCCD4883

We also have other designs ready to ship.  You can order any one of these variations here

Posted on Leave a comment

6.5L GEP Turbo HMMWV

So, we’re going to try blogging while on the road.  No, I’m not wring this while driving, I’m atcually at SubWay.  So, I’m headed to the annual IV8888 show.   I’ll be linking up with Jeff from GearReport  and the rest of the IV8888 crew.

Im actually on the road with my newly installed 6.5L GEP turbo motor in my MasterCraft HMMWV.   Just like any turbo she takes time to spool up.  She really shows her true colors at the higher speeds.  Just check out this video of me on the fast lane, kind of going too fast.

She’s doing grea!

While we were at it we also flushed and cleaned the whole cooling system.  It’s so efficient now that I was actually worried about the truck running too cool.

Next note worthy update was an upgrade to a 80MPH Speedometer.

8C216C30-1017-4344-935D-F42716D3F976

Here are some pictures of the engine.


Posted on Leave a comment

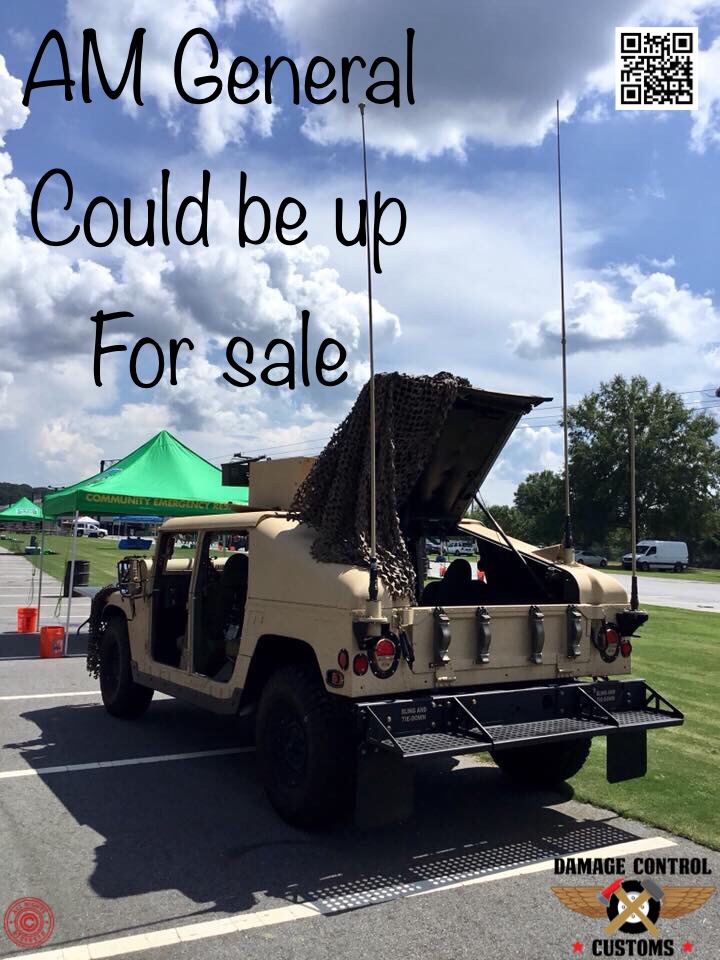
AM General up for Sale?

According to reuters.com it appears that AM General may be up for sale again.   Who wants to create a pool and buy it :)?  Wouldn’t that be nice, but not likely.  Maybe one day, but not today.

According to Reuters: Potential bidders include competitors in the military ground vehicle market, such as General Dynamics (GD.N), Oshkosh Corp (OSK.N) and BAE Systems PLC (BAES.L) according to two people familiar with the matter. Auto makers like FIAT Chrysler (FCHA.MI) and General Motors Co (GM.N) may also be potential buyers, one of the sources added.

What do you think this mean for the private market?  Is this a good thing or a bad thing, leave a comment and voice your opinion.

Let’s keep our eyes and ears close and see how this plays out.


Link to actual article: https://www.reuters.com/article/us-am-general-sale/humvee-maker-am-general-is-up-for-sale-sources-say-idUSKCN1MB3U4